How to develop for the Oculus Rift with Unity Free
What you'll need:
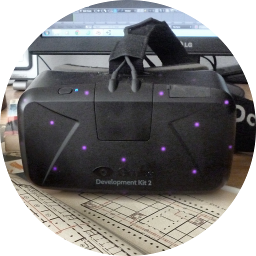
1. Oculus Rift (duh)
If you don't have one, you can:
- order a DK2 from Oculus VR: http://www.oculus.com/dk2/
- buy a second hand DK1 (or DK2) online at your own risk.
- lend one from a friend, if you have cool friends. :p
Make sure it's working and you have Runtime 0.4.3 and Firmware 2.12 installed:
2. Unity
Currently the only Unity Free versions that work are 4.5.51 and 4.6 beta2:
Update: user kersk (Oculus) says the following on reddit: "Yep, at least Unity 4.5.5f1 or 4.6b21 are required for free to work. You'll also want to upgrade since both 4.5.5f1 and b21 have some other good fixes for VR (such as fixing DX9 extended mode being capped @ 60hz, etc)."
or
- Personally tested with 4.5.5f1. The latest stable release.
- Version 4.6b21 reported to work by davehampson (Unity) on reddit. May be unstable. Has advanced UI, better suited for VR.
3. Oculus Unity libraries
Download and unzip the Unity 4 Integration:
4. Develop!
Read the fine manual:
If you want to, you can first test out how they created the excellent Tuscany villa demo:
- Start Unity.
- Create a new project.
- Double-click OculusUnityIntegrationTuscanyDemo.unitypackage (unzipped in step 3) or import it using Assets -> Import Package -> Custom Package....
To create your own VR scene:
- Open an existing project or create a new one.
- Double-click OculusUnityIntegration.unitypackage (unzipped in step 3) or import it using Assets -> Import Package -> Custom Package....
- If your scene has an existing Camera or First Person/3rd Person Controller, disable it by setting it inactive.
- Add the OVRCameraRig or OVRPlayerController prefab to your scene. The prefabs are located in the Project pane in Assets > OVR > Prefabs and can be dragged into the scene or Hierarchy pane. If you use OVRPlayerController make sure there is a collider (floor) beneath it and set the Y-position at least 1.5 meters above the collider.
You can now:
- study and edit the scene.
- preview it in Oculus Rift mode:
- Pressing the Unity Play button will show the scene in stereo view on a normal monitor. Turning the Rift should change the perspective.
- By setting the Rift to extended mode using the Oculus Configuration Utility, this view can be dragged to the Rift's screen.
- build it to a PC or Mac standalone:
- Make sure the resolution is set to 1920x1080, Run in Background is checked and Aspect Ratios are set to 16:10 and 16:9 in Edit -> Project Settings -> Player under Settings for PC, Mac & Linux Standalone.
- Optionally set the Anti Aliasing to 2x or 4x for Standalone in Edit -> Project Settings -> Quality.
- Choose the Target Platform in File -> Build Settings... and press Build.
- Run the resulting Projectname_DirectToRift.exe (intended for direct-to-rift mode) or Projectname.exe (intended for extended mode).
Last update: 2014-11-03 | Part of VRmuseum.nl